No products in the cart.
Getting to Know the Gravity Bong – Perks & How to Make One
1 Jun 2021

There are tons of unique and creative ways to smoke weed these days, from more nostalgic and traditional methods such as joints, spliffs, blunts and bongs, to more innovative and versatile accessories, such as the tried and true gravity bong.
If you’ve been in the weed world for a minute, you might already know what a gravity bong is. However, if you’re new or simply don’t know, don’t sweat it!
We’ve taken the time to sit down and spell it out not just in the context of what a gravity bong actually is but also what tokers believe makes them so special, the particular perks they provide, and how to make a gravity bong of your very own!
So, get ready, because we’re about to change your toker life for the better!
What is a Gravity Bong?

Also known as a geeb, geebie, GB, or jib, gravity bongs are essentially a cannabis consumption method. They’re ideal for tokers looking for a fun little dank DIY project that requires just a few household materials if they’re at a loss for more standard smoking materials, such as rolling papers.
Essentially, a standard gravity bong consists of a base container filled with water, a smaller bottle that serves as a vacuum and a bowl head.
All you need to make a gravity bong is two empty plastic bottles – most of the time, users make gravity bongs out of water bottles – to funnel smoke through bong water and push it through before you inhale, and the smoke consequently enters your lungs.
A gravity bong works by utilizing air pressure and water to draw the smoke out of the makeshift device. It relies on suction to pull the weed smoke from the bowl head into the chamber of the smaller water bottle.
Once the smoke fills the chamber, you remove the bowl head and inhale from the mouthpiece while plunging the bottle back into the water.
Gravity Bong vs Waterfall Bong – What’s the Difference?
There are two specific types of gravity bongs. It’s a common misconception that they are one and the same. However, some distinct differences set them apart.
Firstly, there’s what’s known as a bucket gravity bong, which is made using a plastic bottle and a bucket full of water. Hence, the name ‘bucket’ gravity bong. Shocking. We know. These are fun to make for one-off smoke seshes, but it’s best to use a professionally-built model if you want to use one repeatedly.
You can also make a bucket bong using two plastic bottles of different sizes.
The second variation is known as a waterfall bong. These are similar to the bucket type. However, instead of pulling the bottle up from a bucket, which, in turn, creates the suction or vacuum we talked about earlier, you drain the water out of the bottom.
So, essentially, the primary difference between the two smoking devices is the change in air pressure. A bucket bong is pulled up out of the water, creating a vacuum. A waterfall bong has a hole through which the water flows out, causing the air pressure change, drawing smoke into the chamber.
Regarding which is better, it comes down to personal preference and accessible materials.
Benefits of Using Gravity Bongs

Many blazers appreciate gravity bongs because they supply a more concentrated hit than traditional bowls or bongs.
If you make one properly, you could potentially pull an entire bowl’s worth of smoke and subsequently a full dose of THC into the chamber at one time.
This greater concentration is because of the lack of additional air in the chamber, meaning that not only will a gravity bong get you stoned, it will defy the laws of gravity to make you feel 7 on the high scale!
Depending on how often you smoke weed and your general lung capacity, this could be a very good or potentially bad thing. Of course, there’s something to be said for pacing yourself and going at your own speed regarding your individual tolerance level.
No one wants to take on more than they could handle and suffer from a green out!
As such, it’s important to remember that one single hit from a gravity bong will be significantly stronger than you’d likely anticipate. So, for all you novice tokers out there, it’s best to leave these harder hits for more experienced smokers and work your way up to using a gravity bong.
Additionally, gravity bongs are fun to make for users looking to get a bit craftier with their cannabis consumption method. There’s a fun nostalgia factor that plays into their appeal.
Suppose you are an intermediate to advanced user who isn’t necessarily the most DIY-friendly or inclined. In that case, you can also buy gravity bongs to add to your collection of weed accessories should you wish to use them repeatedly whenever you feel inclined to a unique and particularly potent smoking sesh.
As we said, if you plan to use it more than once, then you’re better off buying a professionally-made model.
How to Make a Gravity Bong
Now that you know what it is and why users love them, you may be wondering, “how do I make a gravity bong?” Well, we’re about to tell you!
Making a gravity bong may seem like an intimidating task. However, below, we’ll outline just how easy and straightforward the creation process is! All it takes is a little creativity, determination and roughly 10 or so minutes, and you’ll have your very own to show off to your friends at your next smoke sesh.
Here’s What You’ll Need:
- Water bottle/plastic bottle (any size, but ideally 16-20 oz)
- A bucket or 2-litre plastic bottle/water bottle
- Aluminum foil
- Box cutter or sharp knife
- Poking device
- At least one gram of weed (your strain of choice)
- Lighter/hemp wick
Here’s What to Do:
Step 1 – Cut the Smaller Bottle
With your box cutter or knife, cut the bottom off the smaller plastic bottle, but be careful and watch your fingers! Nobody needs to lose a digit during this process. The more of the bottle that remains, the bigger your hit will be, so be careful you don’t trim off too much from the bottom of the bottle.
Step 2 – Cut the Larger Bottle
Cut the bottom off the larger 2-litre plastic bottle and fill it with water. If you opt to use a bucket, all you have to do is fill it with water.
Step 3 – Make a Hole in the Bottle Cap
Unscrew the smaller plastic bottle cap and use your knife or box cutter to make a hole in it. Again, watch your fingers! The hole should be large enough to draw air through, but not too big that the aluminum foil and, subsequently, your weed fall through into the water of your gravity bong.
Step 4 – Shape the Bowl
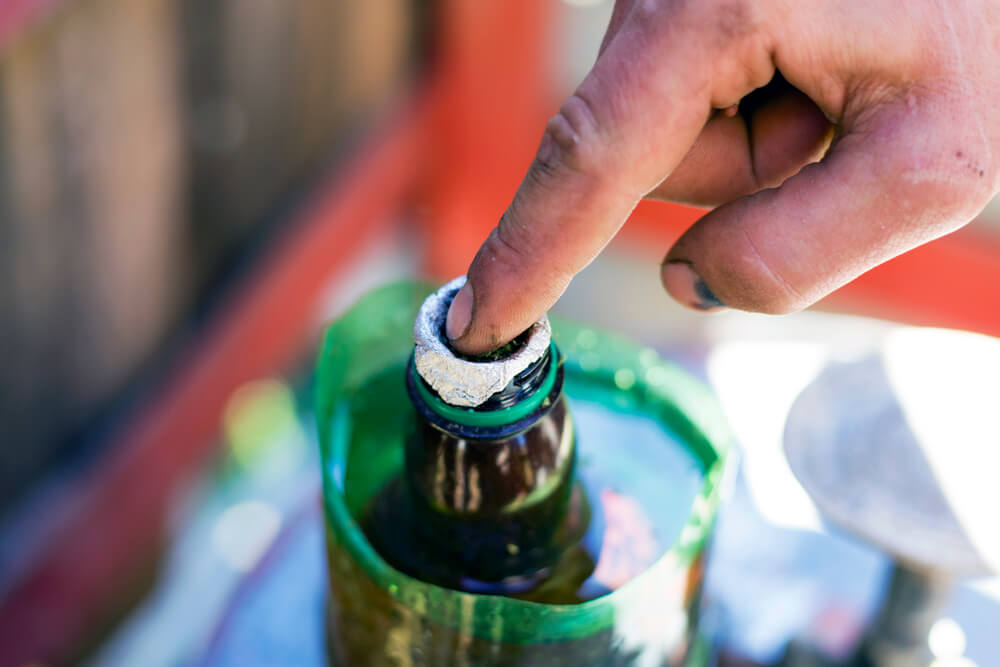
Wrap the bottle cap in the aluminum foil, shaping it to create a small ‘bowl’ divot for your weed. You can fashion the bowl to be as deep as you want, and the aluminum foil will serve to ensure that your bud doesn’t fall into the water below. This step may require you to cut off any excess foil and shape it to avoid spilling any weed.
Step 5 – Poke Holes in the Foil
Using your poking device, make holes in the aluminum foil. However, before you go about doing it all willy nilly, you must be careful not to rip the foil. To ensure proper ventilation, poke roughly 3-5 holes.
Step 6 – Load Your Weed in the Bottle Cap

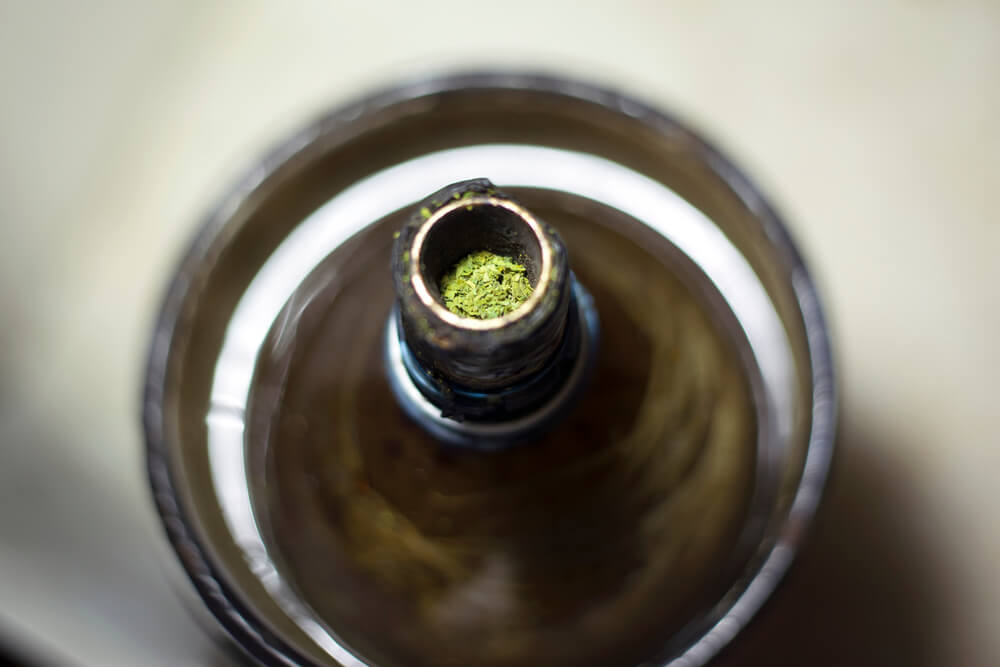
Gently place your weed of choice into the foil-wrapped bottle cap, but don’t screw it on just yet!
Step 7 – Submerge the Smaller Bottle
This step is where things get a little bit more calculated. Immerse the smaller bottle into the bottom of the water-filled bottom half of the larger bottle – or the bucket, if you went that route, instead – until only the cap remains above water. Then, very carefully screen the foil-wrapped bottle cap back onto the bottle.
Step 8 – Spark up Your Weed
Light your cannabis and slowly pull the smaller bottle upwards out of the water as the bottle fills with smoke. If you notice that it doesn’t fill with smoke, it may be because the bottle cap isn’t screwed on fully. Check that there are no holes or gaps in the side of the bottle.
Any potential leaks could compromise the integrity of your gravity bong. In this way, it may take some experimentation before you create a fully functional smoking device.
Step 9 – Unscrew the Cap
Once you see that the bottle has filled with smoke, gently unscrew the cap and place your mouth over the opening of the bottle.
Step 10 – Push the Bottle into the Water
Carefully push the bottle back into the water. As the water enters the bottle, it will push the smoke into your lungs. The weed smoke itself will be a cooler temperature since it’s been filtered by the water, but it will still hit you hard with a high dose of THC.
For optimal results, brace yourself and don’t force your lungs to inhale more smoke than they can handle. These hits can bring even the most seasoned tokers to their knees in an aggressive coughing fit, so be careful!
Venturing Where no Bong has Gone Before
There you have it! You have successfully acquired the necessary skills to be able to make your very own gravity bong. However, we said it once, and we’ll say it again, these devices pack a powerful punch!
In this way, if you’re new to the world of weed and still have your little lungs, it’s best to work your way up to these. After all, smoking weed is a marathon, not a sprint, and these bongs aren’t going anywhere!
Even for more experienced smokers, hits from a gravity bong are far more concentrated than other smoking devices, such as joints, blunts or other bongs. So, prepare yourself and be sure you don’t have any other plans on your schedule because you’re about to experience a high that will send you straight into the stratosphere!
That said, as with any other cannabis accessory or product, be safe and don’t take on more than you can handle. Nobody needs to suffer from an unnecessary green out.
With all this in mind, be safe, be smart, and happy blazing!


